
After you obtain Nayru's Flame in the Sandship and learn Din's Power, you can enter Din's Silent Realm.
Go to the Trial Gate
Go to the red column and choose the Volcano Ascent Bird Statue, and save the game at the statue. The trial gate is just south of the statue.
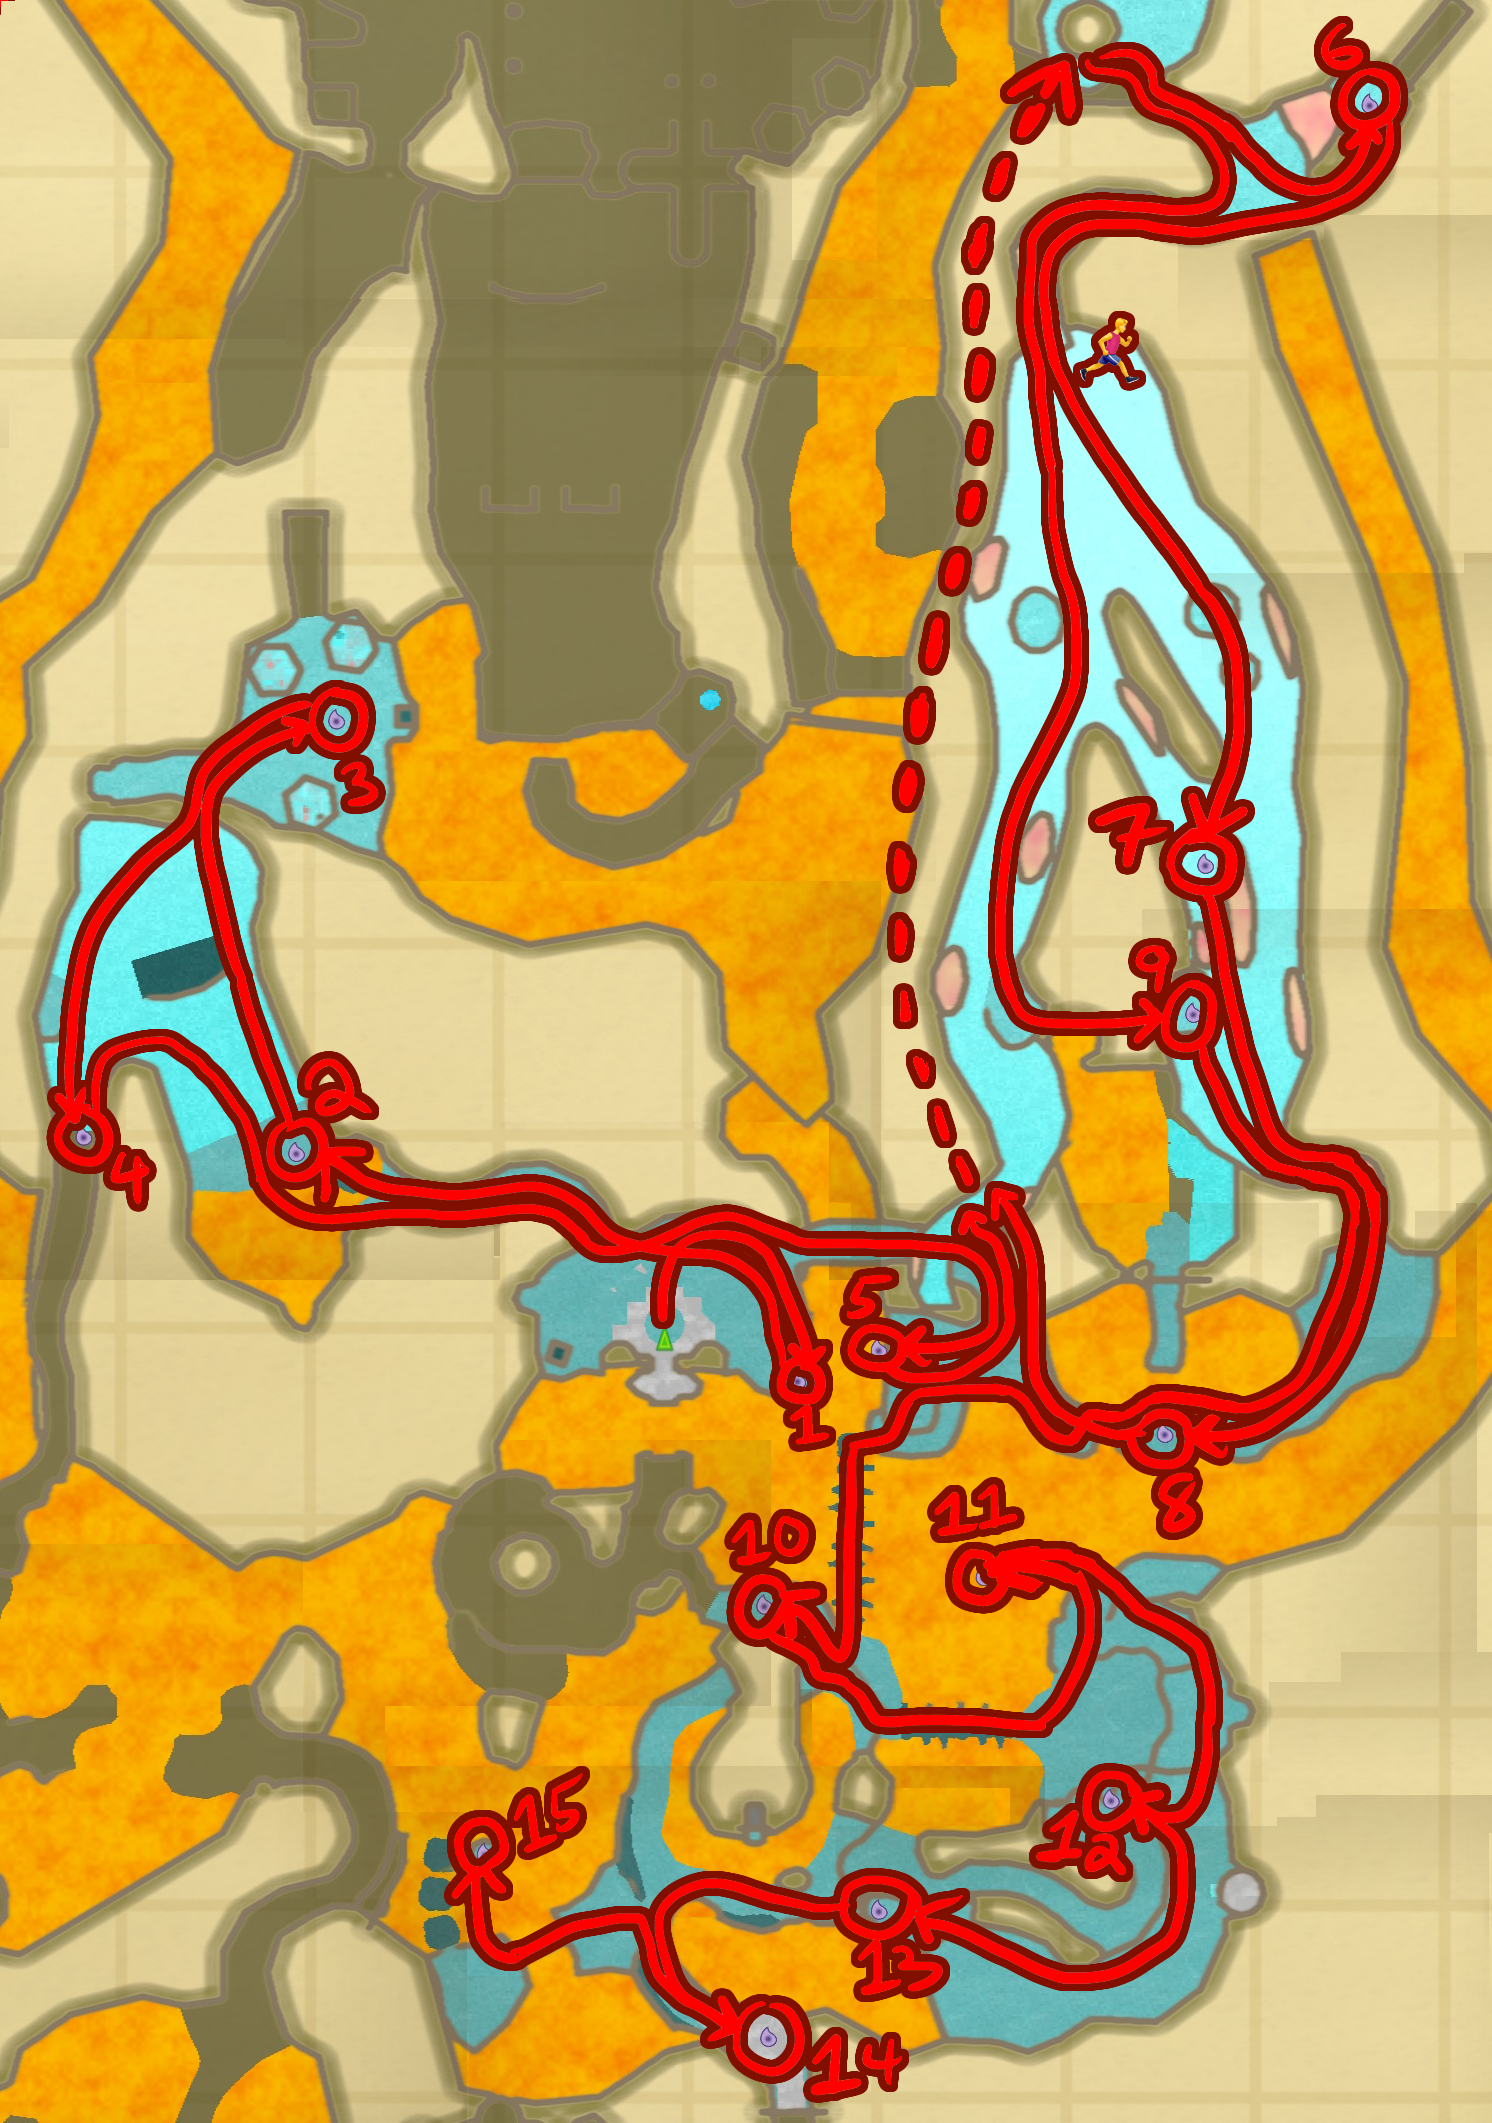
Din's Silent Realm
There is a Tear of Din close to where you start, but there is also a Guardian close to it. Fortunately, you can outrun the Guardian fairly easily. Just run up the ramp and the Guardian will become distanced from the tear, so you can run around and get Tear #1 without getting caught.
Next, turn around and through the northwest cave. Jump across the lava platform to reach Tear #2.
This steep slope has many Watchers floating around. Run up the east side of the slope, timing it so you don't get caught in the lantern light, and pick up the Stamina Fruit as you go, so that you don't have to stop on the platform, where you will likely end up in the Watcher's lantern light. At the top of the slope, climb the ledge and go to the right to get Tear #3.
Go back to the slope and carefully run or slide down the west side to get Tear #4 at the bottom. The tear will refill your stamina.
Go partway up the slope, then go east and down the slope, and go back through the tunnel to return to where you started in this Silent Realm. Go through the cave to the east. You will go past an air geyser. Ignore that for now and go south to exit the cave. Then go west and climb down the vines to get Tear #5.
Climb back up and go back to the air geyser in the cave to the north. Jump into the rising air and you will end up at a higher part of the volcano. Go south, then east into the hot room (which is safe to be in right now) to get Tear #6.
Don't jump down from here or you will fall into the Waking Water below. Go down the ramp instead. Then go to the southwest exit, where you will start sliding down through a tunnel. Stay on the left side to avoid the puddle of Waking Water up ahead. As soon as you emerge from the tunnel, hold the run button so you can run down the big slope to the air vent on the left. (If you don't run, you will slide, and it is too difficult to reach the next tear by sliding.) The air vent will put you onto the platform, and from there you can run southeast to land on the next platform. From there, you can run all the way down to Tear #7. Afterward, you can either run, or allow yourself to slide down the rest of the way while avoiding the Waking Water.
At the bottom, you will fall out of a hole in the side of the volcano. Up ahead you will see Tear #8, so jump over and get it.
Go west and then north, and use the air geyser. Go south into the hot room, then go southwest and stay to the left again to avoid the Waking Water on the right. This time, stay to the right, and look for the Light Fruit on the left, at a flat area you can stop on. Go to that Light Fruit. There are two air spouts here. They stay active constantly, unlike the ones on the mountain that turn on and off, so just jump across both of them to reach Tear #9.
Jump down from this platform and slide your way down to the bottom of the volcano, watching out for Waking Water. At the end, go west, then look southwest to see a spine-shaped bridge. Carefully go down to it quickly run across it, then climb up the ledges at the end and go northwest to reach Tear #10.
Go southeast run east across the second spine-shaped bridge, being careful to stay out of the Watcher's lantern light. On the other side, go north up the ledges, and carefully jump across the lava platforms to get Tear #11 from on top of a piece of bone.
Next, go back across the lava platforms and up the ledges to the cliff wall on the east. Go south until you see a rope near a tear. Jump onto the rope and swing through Tear #12.
Swing back to the ledge that you jumped onto the rope from, then go south and west. Tear #13 is on the ledge past the Guardian.
Drop down and go west, then south to find Tear #14 at the end of the narrow path.
Go north, then west, and crawl through the narrow passage past the Light Fruit, then walk across the steep rope. Be sure to tilt side to side repeatedly to keep from losing your balance. Get Tear #15 at the top of the platform.
As with the other Silent Realms, once you have all the tears, there is no more countdown, but remember to avoid Watcher lanterns and Waking Water.
You can either climb back down the steep rope, or carefully jump down to the lava platforms below. Crawl through the hole, then go east and make your way along the path to reach the spine-shaped bridge. Avoid the Watcher's light, then go north across the next spine-shaped bridge. Go east and climb up the vines, then go north and finally west to return to the protective circle where you started. Enter it to complete the trial.
You will get the Fireshield Earrings, which will allow you to go safely through hot areas. This will allow you to reach the Volcano Summit.